Help Center
Manage Folders and Save & Preview Image Map and More..
Organise your files in a traditional folder pattern.

Click on Folder button available on the top left corner, it will open the lists of folders with options to manage it.

Clicking on the button “Create First Level Folder” will create the folder at the root level of the library as shown in the figure.

Clicking on the Create button besides each folder list will create a sub folder under folder name mentioned in “Folder Name” column.

Clicking on above any method opens dialog. Enter folder name to create a folder and then click on create. It will create folder at respective location.

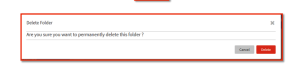
Click on Delete button to permanently remove the folder from library. It will ask for confirmation as shown in below figure. If you are sure, then click Delete again

Save an Image Map

Once you configure all the required properties in Image Map Builder, you must save the changes, to see the update on your SharePoint page. To save the Image Map, click on Save button available on the top left corner, it will save the Image Maps in the backend at the location you specified in “Folder Path” control under “Image Map – General Tab” and if it is not selected then it will save it at root level of library. If the Image Map file name exists you will be prompted to overwrite with the changes.
Preview an Image Map

Once you have saved an Image Map you can insert into any SharePoint page or Microsoft Teams Tab with the SharePoint Image Map SPFx Web Part. This can be downloaded from the Microsoft AppSource – https://appsource.microsoft.com/en-us/product/office/WA200002033. When you deploy the Image Map Web Part it will be accessible for you to add Image Maps to any SharePoint Pages.
Image Maps Creator / Viewer Permissions
The Image Maps for SharePoint App works in accordance with native SharePoint permissions. You can restrict who can view an Image Map by restricting the SharePoint page or site permissions. You can also restrict who is able to create or modify Image Maps by managing the permissions of the Image Maps files stored in the hidden document library within the SharePoint site the Image Maps app is installed. The Image Maps hidden folder is named: ‘SharePointImageMapAssets’.
Render Image Maps over SharePoint Pages
In order to render SharePoint Image Map over SharePoint Pages, you have to download SharePoint Image Map Web Part from the Microsoft AppSource click here or the downloadable package (on request). In the downloaded package, you will get “.sppkg” file and deployment and usage of SharePoint Image Maps Web Part. In the deployment and usage instruction guide, we have added instructions to deploy the web part to the SharePoint App Catalogue site and how to add the web part within your SharePoint site and use it with SharePoint Classic and Modern Pages.
Update/Delete an Existing Image Map

- To update any existing image map, you can go to the image map builder from the SharePoint
Image Map landing page and click on Load button. - When you click on Load button, it will open a popup with all of the existing image maps. Click
on the row which you want in edit mode. Once you select load it will render selected image map
on canvas for editing. - Click on Delete button to permanently remove the image map. Click on Delete button resides
at right side column on same row. It will ask for confirmation as shown in below figure. If you
are sure then click Delete again. - Once you open an Image Map in edit mode and have made the changes you would like, click on Save button to save the update. If you have already inserted the SharePoint Image Maps Image Maps (V15.0.0.0) Manual | ©2024 SharePoint Image Maps (APPS 365 LTD). All rights reserved. 23 Web Part into the appropriate page it will automatically update and your changes will reflect immediately.
- You can also Load any existing Image Map to the Builder directly from the Image Map Web Part.
Export Image Map
It will export all the setting you made for Image Map as a JSON format.
To export any existing image map, you can go to the image map builder from the SharePoint Image Map landing page and click on Export button.
- When you click on Export button, it will open a popup with the entire existing image map. Click on the done button for which settings you want to export. Once you select Done it will Copy entire JSON data.
Import Image Map
It will import all entered settings for Image Map and rendered image with those settings on canvas.
- To import any image map, you can go to the image map builder from the SharePoint Image Map landing page and click on the Import button.
- Then you click on Import button, it will open a popup with all existing image maps. It will ask to enter settings to import either same format as exported or in SVG xml format.
- After entering all settings, click on import and it will render images with all settings entered.
Image Maps App Security and Data Connections
Image Maps for SharePoint is a client hosted app and therefore does not require any external data connections outside from your Tenant. This ensures that when you run Image Maps in your environment you do not risk any data vulnerabilities. The Image Maps App is approved on the Microsoft AppSource guaranteeing that the App has been tested by Microsoft.
Best Practises
- It will be efficient to use Single Image Map on a site page while you are creating/updating any image map to avoid glitches. After save you may add multiple image maps in a page
as required. - Remove any exiting Image Map / Image Maps App and Web part instance from your site & recycle
bin to avoid any glitch and install the fresh version.